


A few weeks ago Emerald Earth held a week long natural building workshop. Over a dozen people came to participate and many of the worktrade who were already here also participated. It was taught by members, mainly Darryl, Michael, and Sara, and some of the worktrade who had already been through the apprenticeship. Each day at least one technique or step in building with clay soil, straw and sand was taught then everyone got their hands dirty and built. There was also a couple hour long lecture daily focusing on theory and reasoning behind the techniques and practices. And each evening there was a presentation, except the last evening which was a pizza party, talent show and sauna.
Some of what was covered was cob, strawbale, light straw clay, heavy straw clay, straw clay wattle, rough plaster, finish plaster, poured adobe floors, natural paints. In the lectures we learned about foundations, roofs, passive solar design, as well as what we were working on that day and other versions the techniques we were learning.
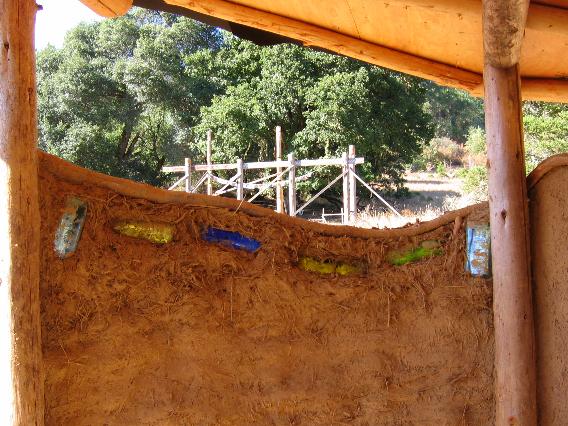
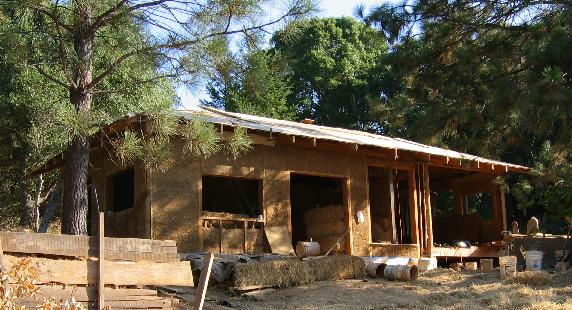
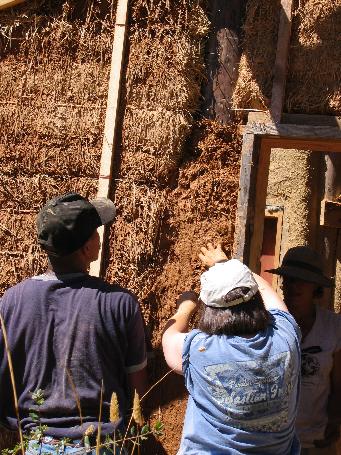
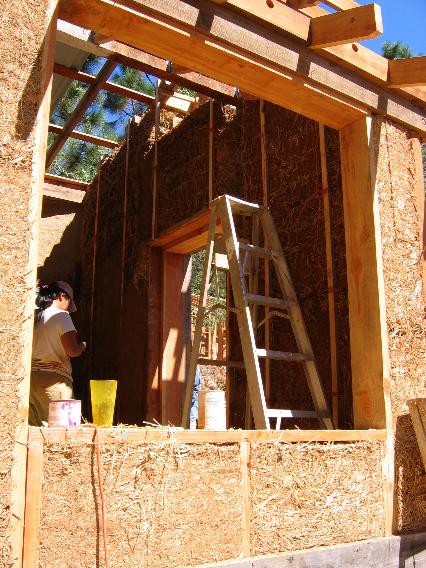
At Strawberry house the internal wall was almost completed using straw clay wattle. The bottom part of the wall is cob, behind the stove, and around the stove pipe is also going to be cobbed so we left a gap for that.
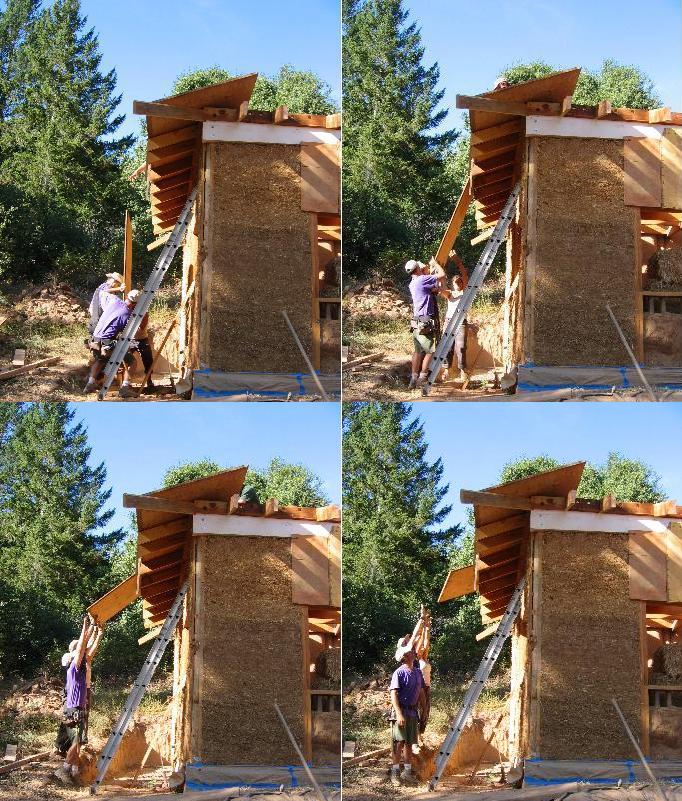
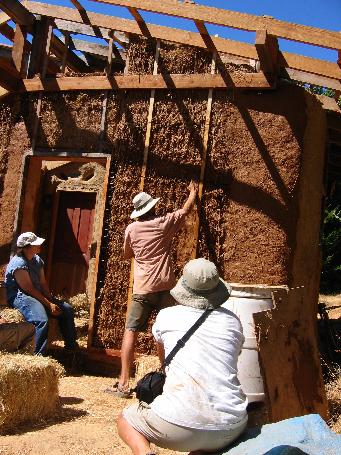
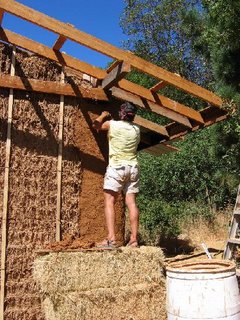
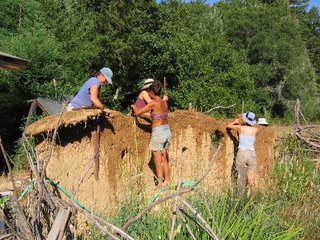
The second bedroom at Madrone House (Deleh's) got two walls put up (it had had plastic up on it last winter), one strawbale and one light straw clay. Heavy straw clay was also used to fill in spaces, both between bales and over posts. We also put up some rough plaster on the strawbale wall. Michael showed folks how to do that, but we didn't get to do too much of it before lunch.
I didn't get pictures of either the strawbales going up or the light straw clay, but the bales are put on top of each other with the layers staggered so the space between bales are not over the space between the bales under them. There is not much space the bales are pretty much jammed into place. Since the side of the wall to the north of the door, the part I worked on, was a bit bigger then two bales we mostly used bales we had to make extra long by taking other bales apart into flakes, then tying a few extra flakes onto a full bale. We did both light straw clay and strawbale in one day by dividing up the workshop participants into two groups and having one work on one in the morning and the other in the afternoon and vice versa.
It really was an intense, very learning packed week. I already knew something about a lot of the techniques taught and had done them to some extent helping out, but I learned a lot more. I am sure those who were pretty new to natural building learned a ton and to some extent probably got overwhelmed.


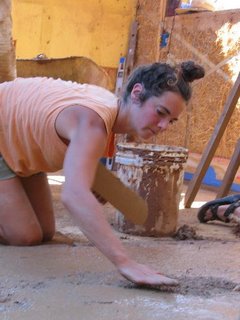

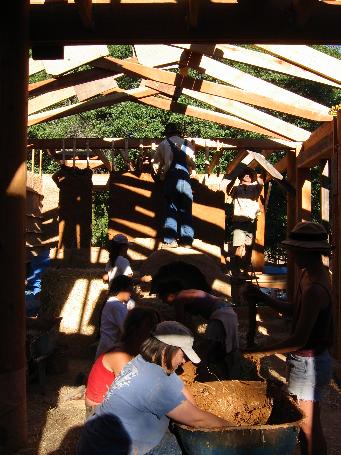
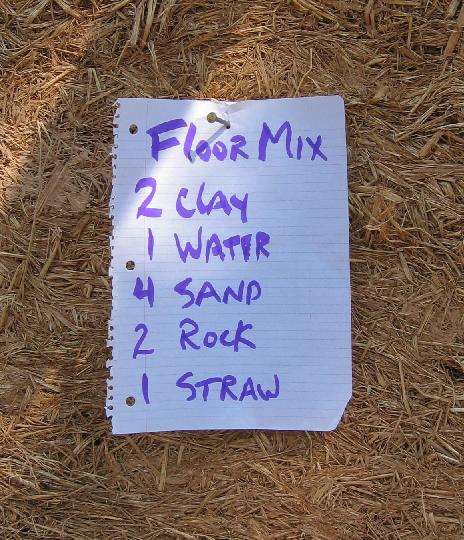
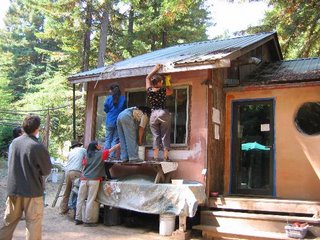
We did the second floor pour at strawberry house. Mixing up clay, water, lava rock, sand, and straw, then putting in on the floor and smoothing it out with a trowel.
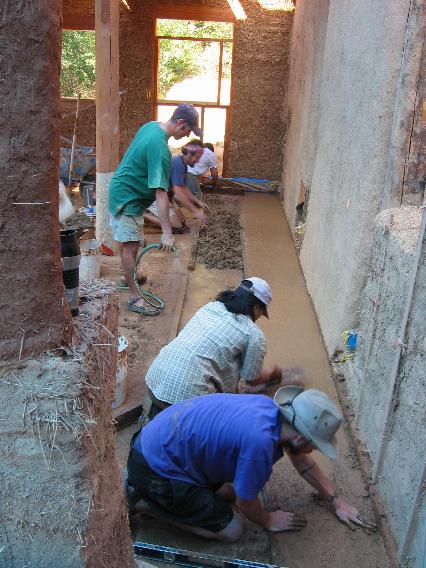
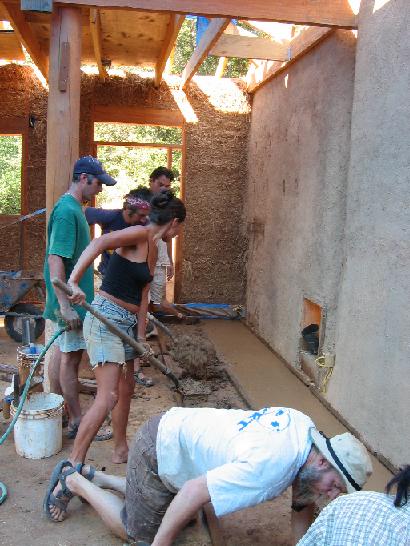
The old floor was swept well to get all the dust and straw off it, and right before applying a segment of the mud mixture it was wet down some to help the new layer stick to the old one. When people were done mixing up batches they got put into wheel barrows and brought into the house then dumped on to tarps or onto segments of the floor that were ready.
To apply a segment you put a 1 1/2 inch thick board a couple feet in front of the already done edge (or the wall) then make sure it is level end to end and with the board on the front edge of the segment behind. You then add mixture, push it into the corners with your hands, or feed, making sure not to have air pockets anywhere then screed it with a board pushing it back and forth and moving it forward to make it pretty level and somewhat smooth, then you use a metal trowel.
Darryl was the main teacher for the floor pour segment of the class, first showing how to mix, then apply the mixture. He is pictured showing Jen how to smooth it out.
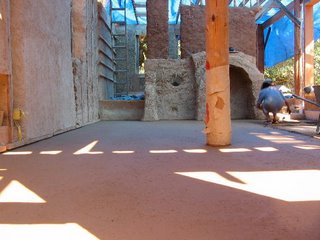
Most of the class went to the lecture and a few people stayed to finish the floor. We worked through lunch, half of the group going to eat then coming back while the other half worked. If we allowed the edge to dry it would crack where the wet mixture met the older dry mixture, so we had to keep going.
After it was done the floor looked really big, although not as big as it is in the picture.


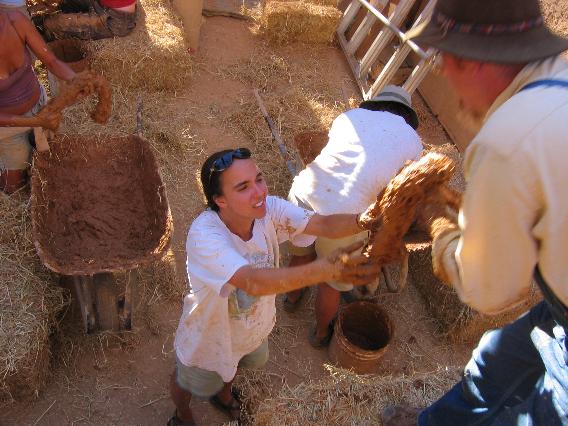
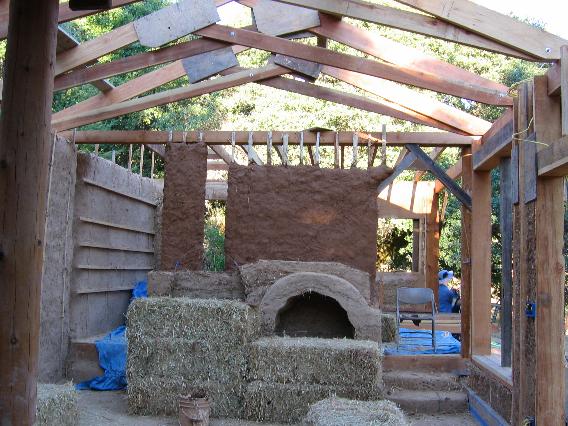
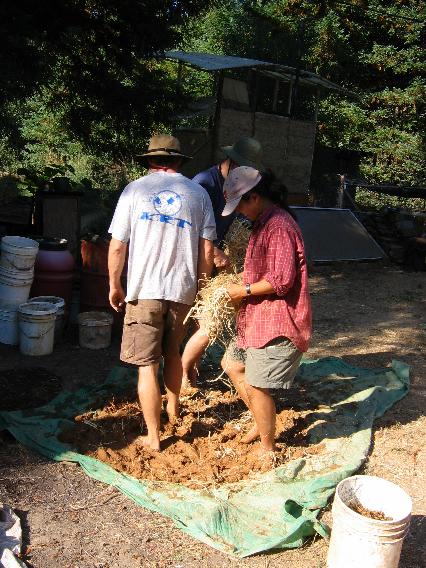
Parts of two days during the course were spent making and applying cob. That way we could build higher up the wall. Since cob can spluge out (push out) making the wall not plumb and straight if you add too much at a time we let it dry then added more a few days later. We were working on a garden wall between the greenhouse and the greywater pond that had been started a few years ago and sat out since then.
We mixed cob on tarps with our feet, first mixing the clay and sand (putting the bucket of sand down first so the clay doesn't stick to the tarp), then adding any water needed then adding the straw.
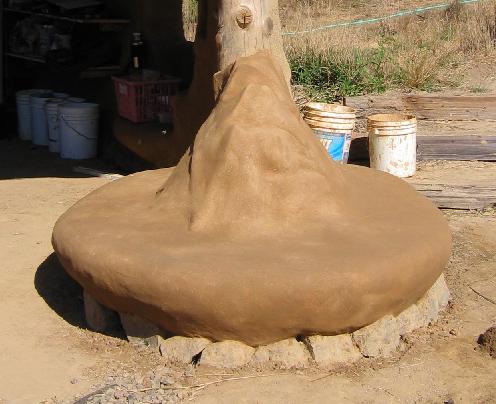
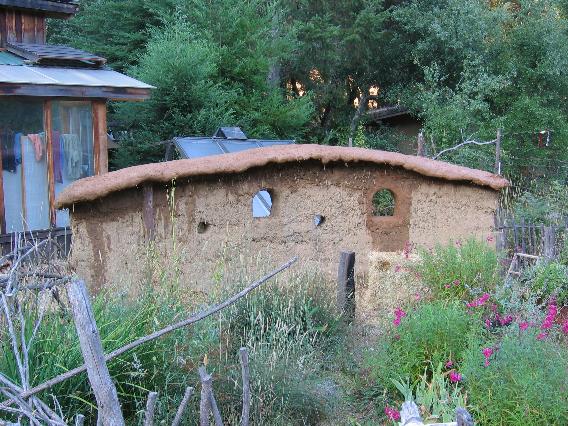
We also created this experimental cob roof, it will get lindseed oil on it to make it shed water. To make the roof we put short segments of redwood branches across the wall every few inches then put cob on top and pressed it into the wood and into the cob below the wood to make it stick. We also made sure that it was higher in the middle so water would flow off, both the middle lengthwise and side to side.
I think it looks really cool now, we decided it was mushroom like and talked about interesting sculptural elements we can add later.


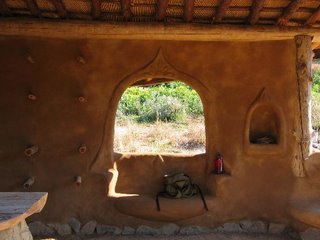

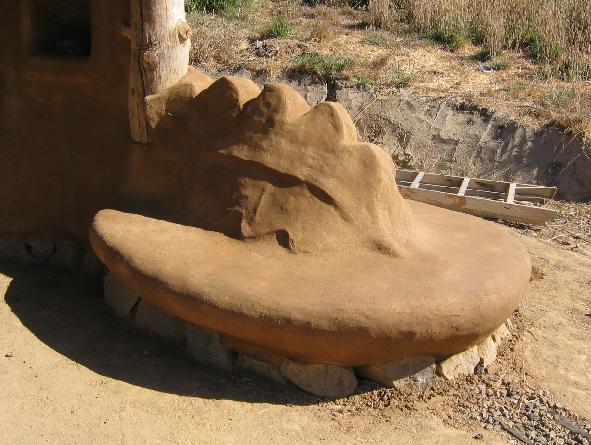
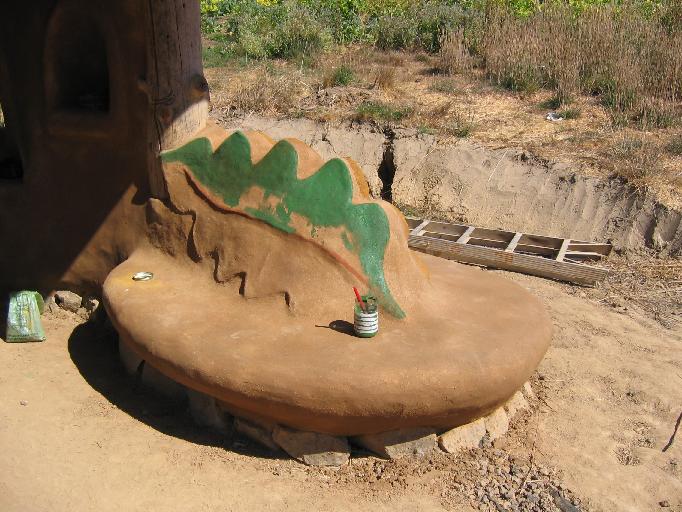
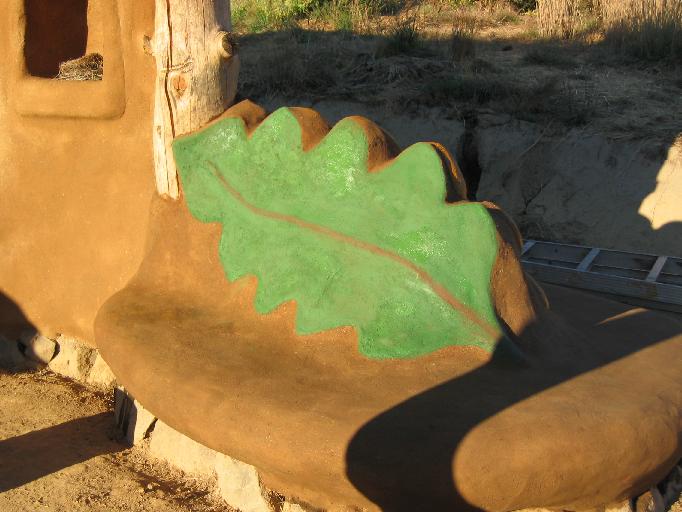
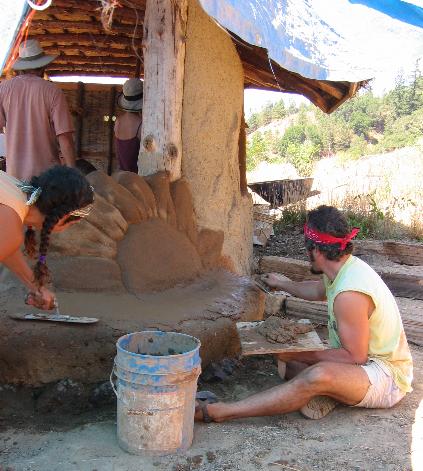
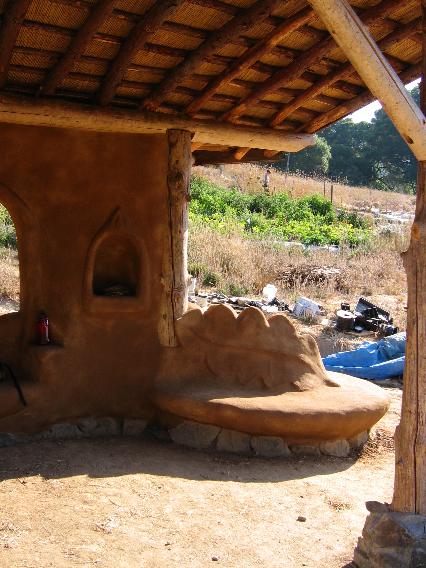
Finish plaster was taught by applying it to the inside of the garden shed on the sunny side. Finish plaster had finer material then rough plaster and only a 1/4 inch or so is applied. It is applied with metal trowels and cut plastic lids to smooth it out nicely, where as with rough plaster you use your hands and sometimes a wooden trowel. You can see the difference between the rough plaster and the finish plaster around that nitch. The bottom two photos of the garden shed are after the plaster dried, you can see how nice it looks now.
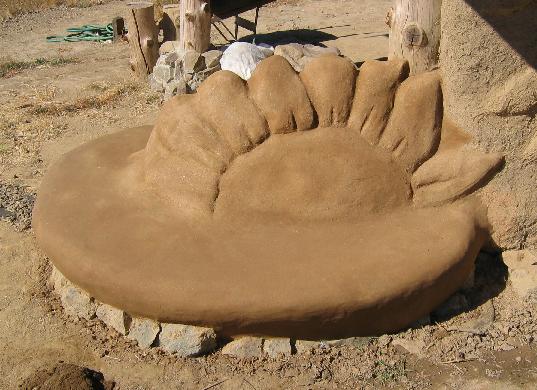
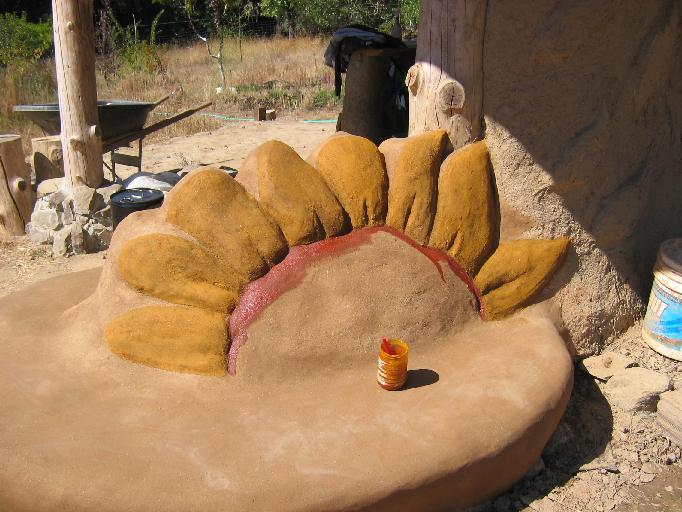
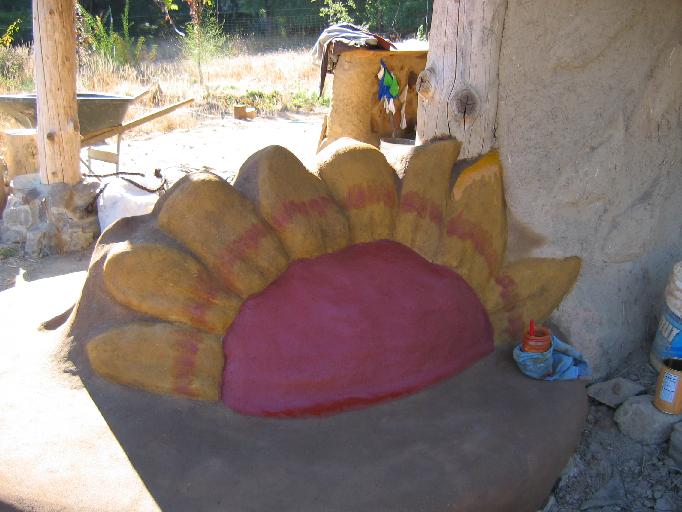
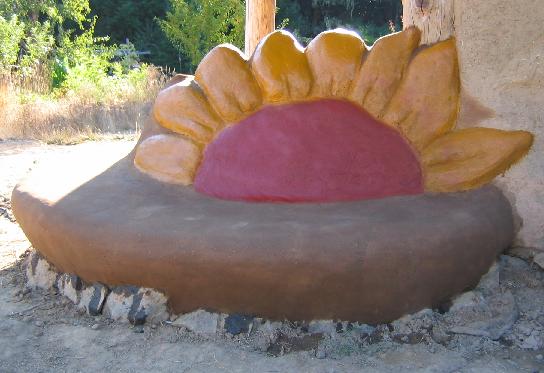
That bench partly out in the open needs lindseed oil applied to it now so water doesn't eat away at the plaster.


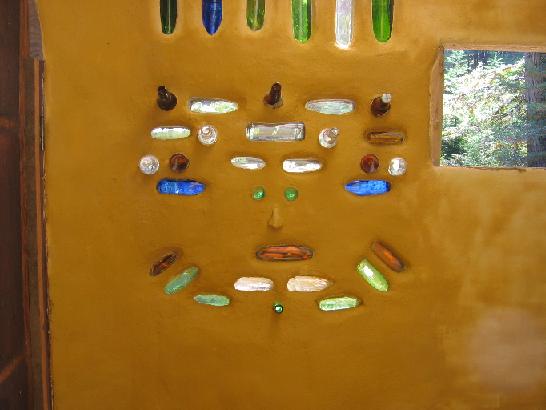
On the last day we go to work with natural paints, both clay based and casein based, and with lime wash, some with clay added to color it and some white. We painted inside the honey house with an alis, a clay based paint, and also Sara added some more blue to the mural on the back wall and that was just a blue pigment (synthetic) and water. (BTW the honey house is the composting toilet nearest the common house.) We used lime wash for the outside of the south end of the east wall of the common house. People wanted to change the color of that wall.
Natural paints can be painted over all sorts of surfaces, such as plywood, sheet rock and most regular paints so they can be used in non-toxic remodeling. In this case the honey house had a clay paint over clay based walls already and the wall of the common house had a lime plaster over a clay wall.
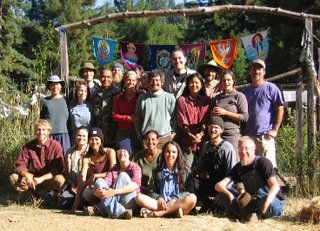
Pictured in the group photo:
(back row) Ian, Creatch (Mike), Christina, Pamela, Ted, Michael, Darryl,
(second row) Ami, Tracy, Alejandro, Sarah Joy, Matthew, Cathy, Heather,
(sitting) Justin, Jade, Amy, Anna, Anastasia, Jen, Mojo, and Jim.
Sara took the photo and Lyn and Brent also participated but are not pictured.